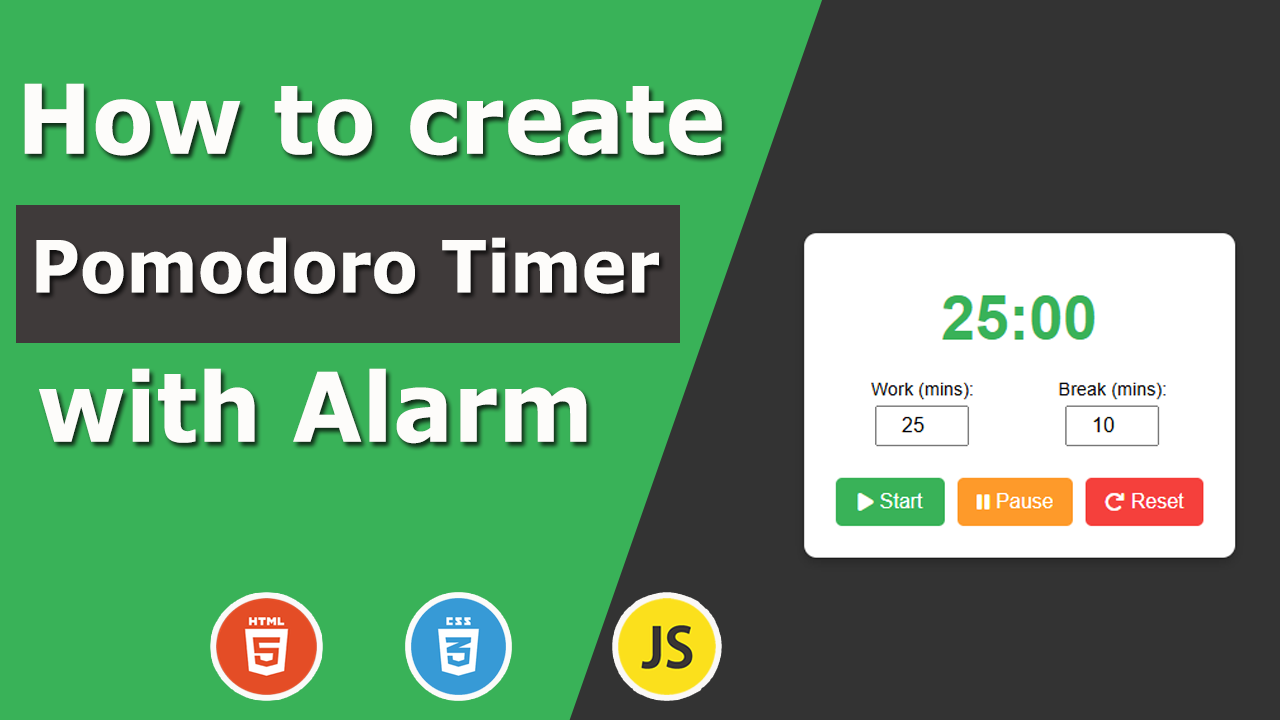
Building a Customizable Pomodoro Timer with JavaScript
Features of the Pomodoro Timer:
- Customizable Work Time and Break Time durations.
- Automatic transition between work and break sessions.
- Visual color feedback when the timer ends.
- Sound notification for session transitions.
- Zoom-in animation for the timer display.
Step 1: Setting Up the HTML Structure
The HTML structure includes input fields for setting work and break durations, a display for the timer, and controls for starting, pausing, and resetting the timer.
<!DOCTYPE html>
<html lang="en">
<head>
  <meta charset="UTF-8">
  <meta name="viewport" content="width=device-width, initial-scale=1.0">
  <title>Pomodoro Timer</title>
  <link rel="stylesheet" href="styles.css">
  <link href="https://cdnjs.cloudflare.com/ajax/libs/font-awesome/6.5.0/css/all.min.css" rel="stylesheet">

</head>
<body>
  <div class="timer-container">
    <h1 id="timer">25:00</h1>
    <div class="settings">
      <div class="time-input">
        <label for="work-time">Work (mins):</label>
        <input type="number" id="work-time" value="2" min="1">
      </div><div class="time-input">
        <label for="break-time">Break (mins):</label>
        <input type="number" id="break-time" value="1" min="1">
      </div>
    </div>
    <div class="controls">
      <button id="start-btn">
        <i class="fas fa-play"></i> Start
      </button>
      <button id="pause-btn" disabled>
        <i class="fas fa-pause"></i> Pause
      </button>
      <button id="reset-btn" disabled>
        <i class="fas fa-redo"></i> Reset
      </button>
    </div>
    <audio id="alarm-sound" src="alarm.wav"></audio>
  </div>
  <script src="script.js"></script>
</body>
</html>
Step 2: Styling with CSS
The CSS styles the timer, input fields, and buttons, adding visual appeal and an animation for the timer display.
body {
  display: flex;
  justify-content: center;
  align-items: center;
  height: 100vh;
  margin: 0;
  font-family: Arial, sans-serif;
  background-color: #f7f7f7;
}

.timer-container {
  text-align: center;
  background-color: #ffffff;
  padding: 20px;
  border-radius: 10px;
  box-shadow: 0 4px 8px rgba(0, 0, 0, 0.2);
  width: 300px;
}

#timer {
  font-size: 3em;
  margin: 20px 0;
  color: #4caf50;
  transition: color 0.3s ease;
}

.zoom {
  animation: zoom-in 0.3s ease;
}

@keyframes zoom-in {
  0% {
    transform: scale(1);
  }
  50% {
    transform: scale(1.2);
  }
  100% {
    transform: scale(1);
  }
}

.settings {
  display: flex;
  justify-content: space-around;
  margin-bottom: 20px;
}

.time-input {
  display: flex;
  flex-direction: column;
  align-items: center;
  gap: 5px;
}

.settings label {
  font-size: 0.9em;
}

.settings input {
  width: 60px;
  padding: 5px;
  text-align: center;
  font-size: 1em;
}

.controls {
  display: flex;
  justify-content: space-between;
}

.controls button {
  flex: 1;
  margin: 5px;
  padding: 10px 15px;
  font-size: 1em;
  border: none;
  border-radius: 5px;
  cursor: pointer;
  transition: background-color 0.3s ease;
  display: flex;
  align-items: center;
  justify-content: center;
  gap: 5px;
  color: #fff;
}

#start-btn {
  background-color: #4caf50;
  }

#pause-btn {
  background-color: #ff9800;
  }

#reset-btn {
  background-color: #f44336;
  }

.controls button:disabled {
  background-color: #cccccc;
  cursor: not-allowed;
}
Step 3: Adding Functionality with JavaScript
The JavaScript adds the core functionality to the timer, enabling users to start, pause, and reset it, as well as switch between work and break sessions automatically.
let timerDisplay = document.getElementById("timer");
let startBtn = document.getElementById("start-btn");
let pauseBtn = document.getElementById("pause-btn");
let resetBtn = document.getElementById("reset-btn");

let workInput = document.getElementById("work-time");
let breakInput = document.getElementById("break-time");

let alarmSound = document.getElementById("alarm-sound");

let isRunning = false;
let isWorkTime = true; // Keeps track of whether it's work or break time
let timerInterval;
let timeRemaining;

// Update the timer display when inputs change
workInput.addEventListener("input", () => {
  if (!isRunning) {
    isWorkTime = true; // Ensure it's set to work time
    updateDisplay(workInput.value * 60);
  }
});

breakInput.addEventListener("input", () => {
  if (!isRunning && !isWorkTime) {
    updateDisplay(breakInput.value * 60);
  }
});

// Function to start the timer
function startTimer() {
  if (!isRunning) {
    isRunning = true;

    // If no time is set, initialize based on the current session
    if (!timeRemaining) {
      timeRemaining = isWorkTime ? workInput.value * 60 : breakInput.value * 60;
    }

    timerInterval = setInterval(() => {
      if (timeRemaining > 0) {
        timeRemaining--;
        updateDisplay(timeRemaining);
        addZoomEffect(); // Add animation effect on each update
      } else {
        clearInterval(timerInterval);
        alarmSound.play();
        timerDisplay.style.color = "#e74c3c"; // Change color to red
        setTimeout(() => switchTimer(), 1000); // Wait 1 second before switching
      }
    }, 100);

    toggleButtons();
  }
}

// Function to pause the timer
function pauseTimer() {
  isRunning = false;
  clearInterval(timerInterval);
  toggleButtons();
}

// Function to reset the timer
function resetTimer() {
  isRunning = false;
  clearInterval(timerInterval);
  timeRemaining = null;
  isWorkTime = true; // Reset to work session
  updateDisplay(workInput.value * 60); // Reset display to work time
  timerDisplay.style.color = "#4caf50"; // Reset color to green
  toggleButtons();
}

// Function to update the timer display
function updateDisplay(seconds) {
  let minutes = Math.floor(seconds / 60);
  let secs = seconds % 60;
  timerDisplay.textContent = `${minutes.toString().padStart(2, "0")}:${secs
    .toString()
    .padStart(2, "0")}`;
}

// Add zoom-in animation effect
function addZoomEffect() {
  timerDisplay.classList.add("zoom");
  setTimeout(() => timerDisplay.classList.remove("zoom"), 300);
}

// Function to toggle buttons
function toggleButtons() {
  startBtn.disabled = isRunning;
  pauseBtn.disabled = !isRunning;
  resetBtn.disabled = !isRunning && !timeRemaining;
}

// Function to switch between work and break time
function switchTimer() {
  isWorkTime = !isWorkTime; // Toggle between work and break
  timeRemaining = isWorkTime ? workInput.value * 60 : breakInput.value * 60; // Set the next duration
  timerDisplay.style.color = "#4caf50"; // Reset color to green for the new session
  updateDisplay(timeRemaining); // Update the display for the next session
  isRunning = false;
  // Automatically start the next session:
  startTimer(); // Comment this out if you want manual start for the next session
}

// Initialize the display with the default work time
updateDisplay(workInput.value * 60);

// Event listeners
startBtn.addEventListener("click", startTimer);
pauseBtn.addEventListener("click", pauseTimer);
resetBtn.addEventListener("click", resetTimer);
Key Functionalities Explained:
- Timer Initialization:
- The timer initializes with the default work time of 25 minutes.
- Inputs allow customization of work and break durations.
- Session Switching:
- After work time ends, the timer automatically transitions to break time, and vice versa.
- Animation and Feedback:
- A zoom-in effect highlights each timer update.
- The timer text turns red briefly when the session ends.
- Control Buttons:
- The
Start,Pause, andResetbuttons provide user-friendly controls.
Conclusion
This customizable Pomodoro Timer is a practical tool to boost productivity. With user-friendly customization options, visual feedback, and sound notifications, it can be further enhanced with features like session tracking or dark mode.